User Tools
Table of Contents
Adding Cases to the UW Radiology Online Teaching File
There are a lot of ways one can digitally squirrel away cool cases. The most socially acceptable way is to put them on our online teaching file so that others can see them and share them.
There are many ways to put new cases in our online teaching file. Many of them are a pain in the butt – largely because our PACS system has such crude export tools. If this process seem a bit Byzantine at first, please point any blame at the PACS system and not at our teaching file system.
To minimize the glutealgia, we highly recommend that you e-mail your cases directly into the teaching file from your PACS workstation in DICOM format. Steps for doing this are shown below…
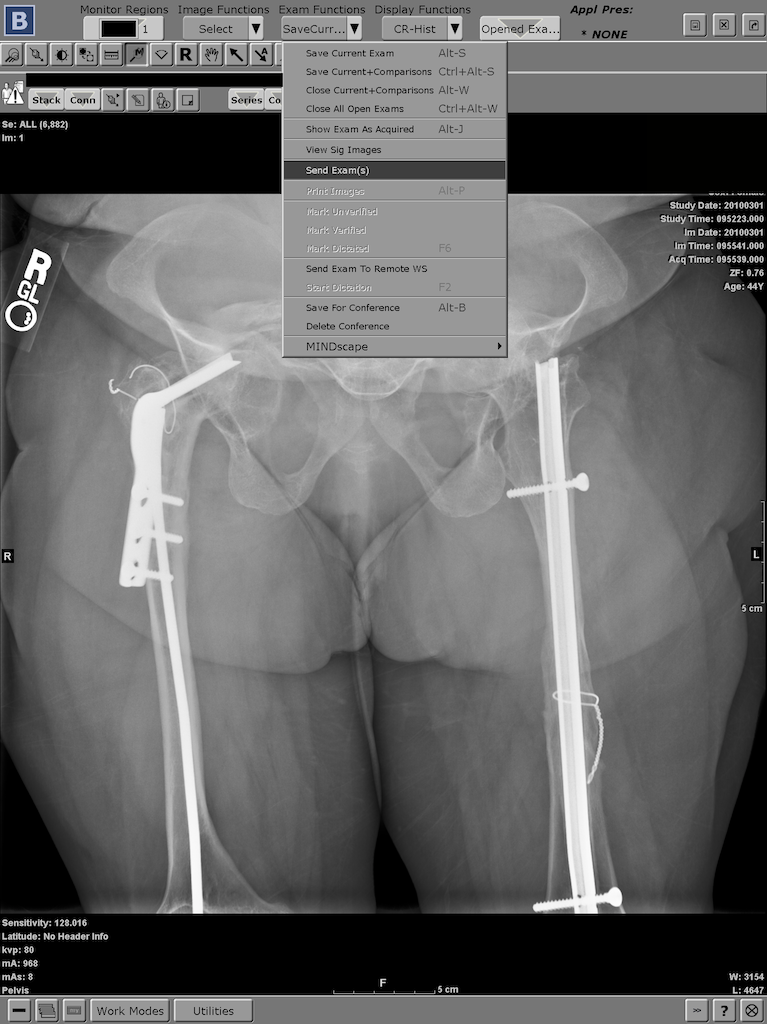
Step 1. Select "Send Exam" under the "Exam Functions" menu on PACS
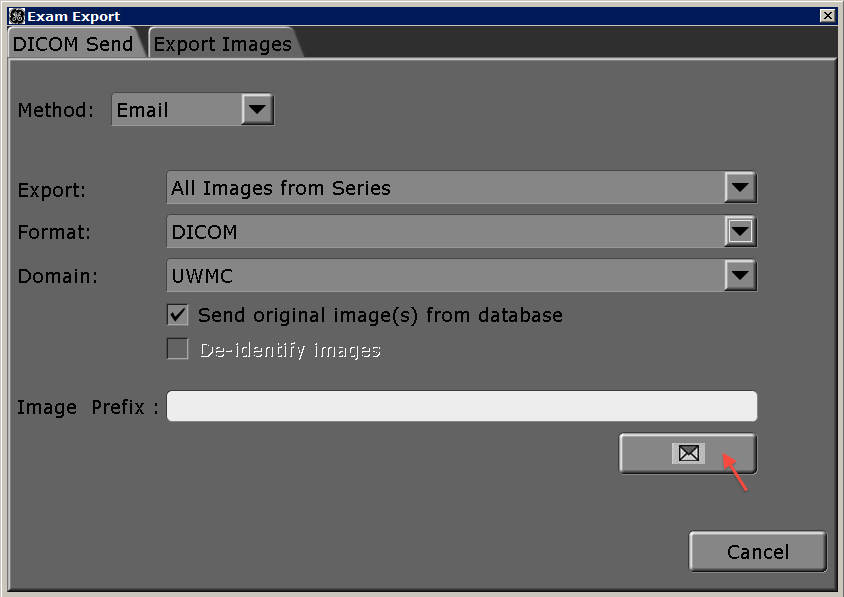
Step 2. Select Export Images Options
On the Exam Export window that pops up, click the “Export Images” tab, and then select the following options:
- Method: E-mail
- Export: All Images from Series
- Format: DICOM
Then click the broad button with an envelope on it.
This will result in the following unhelpful disclaimer screen – click OK so that life can move on.
Step 3. PACS reality check
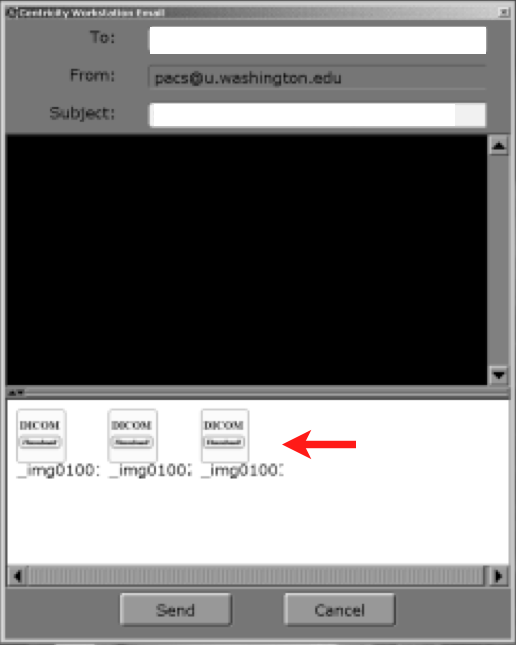
If life is good, you should now see an e-mail box like the one below. This would be a good time to check and make sure that you see some generic image icons corresponding to the images you are trying to export. If you do see these icons, life remains good, and you can move on to the next step.
If you don't see these icons, it means that PACS has failed miserably in its pathetic attempt to export these cases. Your Plan B in this case is to cancel the e-mail box, and move back one step, select 16 bit TIFF as your image format, and then try this step again.
Step 4. Enter your teaching file username
This step assumes that you are a member of the UW Radiology department, and already have a username on our teaching file system. If not, please contact John Powell or Mike Richardson to have your name added to the user list.
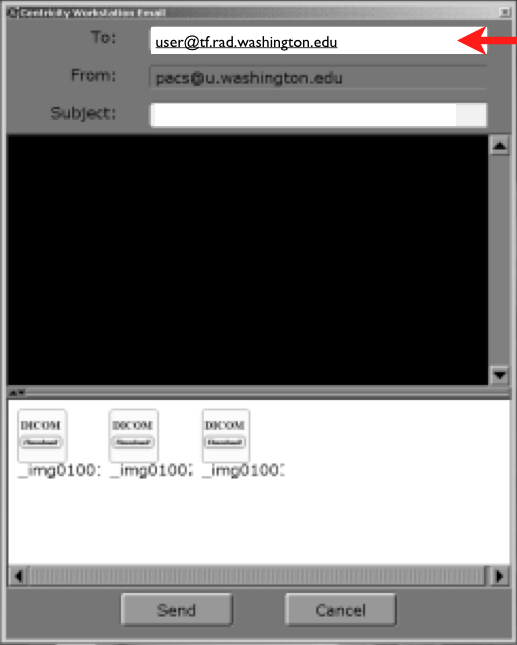
In the “To:” field of the e-mail box, type your teaching file username, followed by “@tf.rad.washington.edu”.
Step 5. Enter case information
Case Title
Your next step is to enter the title of your case in the subject line of the e-mail box. Whatever you type here will become the case title in the teaching file.
Now it's time to add other case information in the body of the e-mail box.
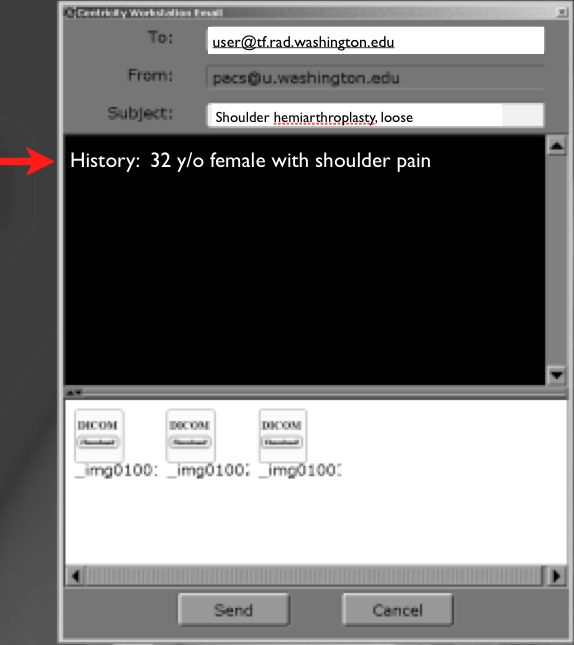
History
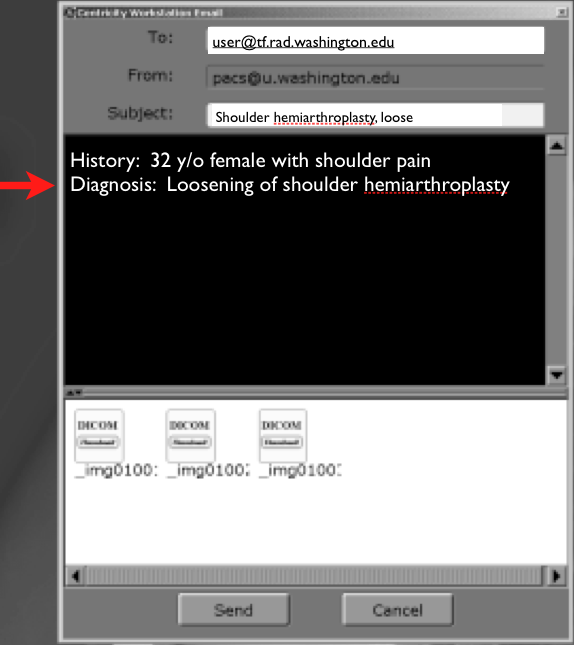
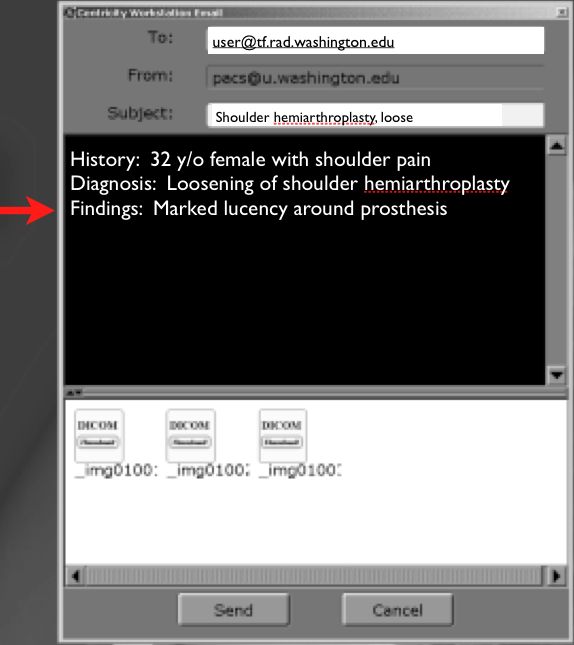
If you type “History:” on a line of the e-mail, the teaching file program will automatically grab the rest of the text on that line and enter it into appropriate spot in the database for this case. Don't forget to add the “:” after the “History”.
Diagnosis
Findings
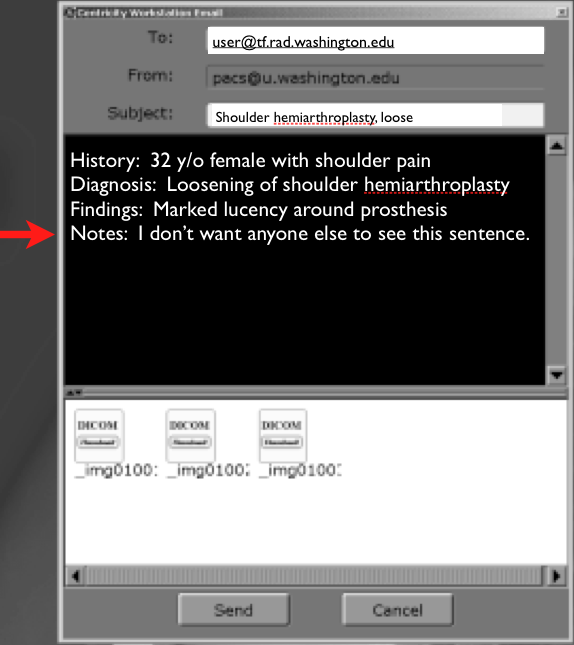
Notes
There are a number of other database fields we can populate in this manner. However, the other main field to know about is the “Notes:” field. This is a spot where you can put information that only you, the case author, will ever see. This is a fine place to place sundry case details that don't fit in other spots.
Step 6. Click the "Send" button
Assuming that PACS and the TF server are both not currently infested with demons, the case will be sent to the TF server.
If this is the first time you have entered images from this patient, a new case will be created, containing the images and the information you entered.
If you have already sent prior images to the TF server for this patient, these new images should be merged with the existing file for that patient.

